Is Your Home At Risk For Lead Poisoning?

Lead PoisoningHow old is your home? If it was built before 1978, there’s a chance that its woodwork contains lead-based paint. Though the use of lead-based paints for homes has been banned in the United States since 1978, many people live in homes constructed before then, and those homes probably contain lead-based paint used in a bygone era before it was known to be detrimental to people’s health.

Lead poisoning occurs when lead builds up in a person’s body over a period of months or years. Little kids who eat lead-paint chips can end up with serious mental and physical problems. Adults who do home renovations and are exposed to lead-based paint and lead-contaminated dust are also at risk. In the old days, lead pipes, brass plumbing fixtures and copper pipes soldered with lead were commonly used in homes. Unfortunately, they could end up releasing lead particles into tap water.

Lead can get into the air, water and soil such that precautions need to be taken if and when a person lives or works around an area with high concentrations of lead.

How do you know if you have lead poisoning? With children, look for developmental delays, learning difficulties, irritability, loss of appetite, vomiting, constipation and other symptoms. As for adults, some lead poisoning symptoms include muscle and joint pain, memory loss, decline in mental functioning, mood disorders, abdominal pain, constipation, and high blood pressure. Pregnant women should be especially careful to avoid exposure to lead as it could harm their unborn child.

First Choice Inspectors of Chicago regularly conducts home inspections. During these inspections, your inspector can look for signs of peeling or chipped paint. Keep in mind that the lead material used in old paint only becomes a health hazard when it is disturbed. If the inspector finds that your home has old paint that’s disturbed, he or she may advise you to seek a professional renovation company to properly remove the old paint.

Asbestos Exposure Could Be Detrimental to Your Health

Asbestos According to the National Cancer Institute, “asbestos is the name given to a group of minerals that occur naturally in the environment as bundles of fibers that can be separated into thin, durable threads. These fibers are resistant to heat, fire, and chemicals and do not conduct electricity. For these reasons, asbestos has been used widely in many industries.”

Unfortunately, areas containing asbestos can release tiny fibers into the air, which could have detrimental health effects on humans breathing them in. In fact, the tiny fibers can amass in the lungs for years, and as the number of fibers increases, the chances of getting sick also go up.

Let’s take a look at a few of the major health issues asbestos can cause:

  • Mesothelioma is a cancer along the lining of the lungs, stomach or heart . The cancer is rare and each case is unique, but fortunately, there are many treatment options.
  • Lung cancer. Even if you’ve never touched a cigarette in your life, overexposure to asbestos can lead to cancer in your lungs, and make it difficult breath, among other awful symptoms.
  • This is a lung disease that makes it difficult to breath, and causes severe coughing bouts and shortness of breath. It also greatly increases the chance for mesothelioma to occur.

Asbestos fibers can cause many other lung ailments, and will significantly and adversely affect how a person lives. As such, if you’re worried about asbestos in your home or workplace, the smart thing to do is to have your home or building properly inspected to make sure you’re not at risk.

To learn more about asbestos inspections, please contact First Choice Contractors today.

Save Money on Your Energy Bills This Fall and Winter

Save Money on Your Energy Bills This Fall and WinterWe’re about a month into fall and already the temperatures are dropping and homeowners are preparing to hunker down for another cold winter. This time of year energy bills can suddenly become far more expensive, particularly if your home isn’t adequately protected against the elements. By taking some preventative measures, however, you can keep your energy bills to a minimum and save yourself a tidy sum by the time spring rolls around.

Start by Sealing the Gaps

Take a walk around your home’s exterior and keep a close eye out for any gaps around window panes and door jambs. Seal these gaps with caulk to prevent heat loss during the winter. If you have a fireplace, make sure that the damper is closed whenever it’s not in use. You can also purchase insulating film from your local hardware store to seal off windows for the season. Just make sure it’s pulled tight across the window and securely adhered to the window frame to prevent heat leaks.

Use the Sun to Your Advantage

Keep the curtains on south-facing windows open during the day to allow the sun to naturally heat your home. Once the sun goes down, close the curtains to trap that radiant heat inside at night. This will also provide an extra measure of insulation against any gaps you may have missed when sealing your windows.

Have Your Furnace Serviced

Maintaining your furnace will prevent mechanical breakdowns and ensure that it operates at peak efficiency during the winter. Be sure to change your furnace filter regularly, and have an HVAC technician perform a thorough inspection once a year.

Bundle Up

This is perhaps the most effective and underappreciated step you can take to keep your utility bills low during the winter. It costs a whole lot less money to put on an extra layer of clothing than it does to keep your thermostat 5 degrees higher all winter. Keep your thermostat set as low as you can tolerate, and set it back further when you’re sleeping or out of the house. You’ll acclimate to the lower temperatures before you know it, and you’ll thank yourself come springtime.

Stay tuned for more home improvement tips and tricks from Chicago’s premier home inspection company: First Choice Inspectors.

Avoid These Common Household Electrical Hazards

Avoid These Common Household Electrical HazardsSpend much time as a home inspector, and you’re bound to see some pretty frightening examples of DIY electrical work. From frayed extension cords to ancient knob and tube wiring, we’ve seen our fair share of electrical hazards over the years. Fortunately, most of these hazards can be quickly remedied in order to keep you and your family safe. Today, we’ll look at a few of the most common electrical hazards we encounter in our line of work.

Over Fused Circuits

This problem tends to happen in older homes whose electrical systems are still protected by a fuse box rather than a circuit breaker. Most circuits in your home should be protected by 15 amp fuses. Sometimes, when fuses blow, homeowners will replace them with larger 30 amp fuses. These large fuses constitute a fire hazard because they won’t blow before electrical loads reach dangerous levels. If you see any green 30 amp fuses in your fuse box, replace them with 15 amp fuses as soon as possible.

Daisy Chained Extension Cords

This is one of the most prevalent electrical hazards we see. It happens when homeowners plug multiple extension cords and/or power strips together in tandem in order to increase their length or number of outlets. According to the Electrical Safety Foundation International (ESFI), the improper use of extension cords is responsible for roughly 3,300 house fires every year. Extension cords should only be used as temporary solutions, and they should never be plugged together with other extension cords or power strips.

Worn or Corroded Wiring

This problem is especially common in appliances such as old light fixtures. If you suspect the wiring in an appliance is faulty, have it inspected by a qualified electrician and rewired if necessary. If you’re ever shocked by an appliance, unplug it and don’t use it again until you can have it repaired.

Covered Cords

In home offices, we’ll sometimes see electrical cords covered by carpets to keep them out of sight. This does help to organize your wires, but it can also cause them to heat up faster and potentially cause fires. Wires hidden under carpets also tend to get walked on and run over by rolling chairs more often, causing them to wear faster. Keep your wires organized with zip ties instead, and keep them out from under carpets.

Dryer Vent Safety 101

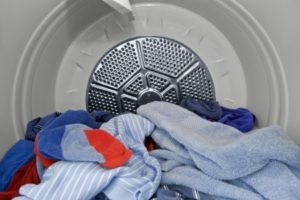
Dryer Vent Safety 101According to the National Fire Protection Association, nearly 17,000 house fires were caused by clothes dryers and washing machines in the United States in 2010. This accounts for roughly 4.5% of all the house fires in the country that year. Many of these fires were the result of clogged or improperly installed dryer vents that went unnoticed by homeowners. These vents are designed to remove residual moisture from your house during the drying process, but if neglected they can constitute serious fire hazards. Today, we’ll help you inspect and evaluate the safety of the dryer vent in your home.

Check Connections

Pull your dryer out and make sure that they dryer exhaust hose is, in fact, connected to the dryer. Typically the connection is located on the back of the dryer, but on some models it may be located beneath it. If the exhaust vent becomes disconnected, moisture will linger in your laundry room and flammable dryer lint will begin to accumulate within the back of the dryer. That additional moisture can promote mold growth in your home, while the dryer lint can easily cause fires.

Check for Kinks

Ideally, the exhaust hose behind your dryer shouldn’t be any longer than it needs to be. Long, loose lengths of hose are prone to kinks and twists that restrict the flow of air and moisture out of your home. As lint becomes trapped in the kinks in the hose and the airflow becomes further restricted, heat can build up in your dryer and eventually trigger fires.

Make Sure the Exhaust Terminates Outside

Sometimes, lazy installers will vent dryer exhaust into an attic or crawl space rather than the exterior of a home. Dryer exhaust must be vented outside and away from your home in order to avoid mold growth and minimize the chance of fire. Find out where your dryer exhaust terminates, and if it’s not outside your home take steps to have it rerouted as soon as possible. Please note that the total length of the exhaust hose should not exceed 25 feet in order to ensure adequate airflow.

The end of your exhaust vent should be fitted with a backdraft damper, but it should not be fitted with a screen. These screens accumulate stray lint and can become serious fire hazards if left unattended. Check the end of your exhaust vent periodically and clear any built-up lint deposits.

Here at First Choice Inspectors, we know how important it is for homeowners to stay mindful of this important maintenance item. If you’re concerned about the safety of your dryer vent, don’t wait for it to become a serious hazard. Give us a call today and gain the peace of mind of knowing your home is protected from dryer vent fires.

Protecting Your Home from Water Intrusion This Winter

Water DamageWe’re halfway through February, and before too long we’ll be due for a healthy dose of spring weather. Here in Chicago, spring is synonymous with snow melt. One warm day in March might unleash millions of gallons of water onto the streets of our fair city. All that water can be disastrous for homes that aren’t properly fortified against the elements.

Water damage constitutes one of the foremost threats to any home’s well-being. Homeowners’ insurance companies spend an estimated $2.5 billion a year on repairing damage from water intrusion. In the interest of lowering that statistic, in this entry we’ll share a few tips for protecting your home against water damage.

Seal Gaps in Windows and Doors

As much as we’d like to think otherwise, homes are not static entities. Over the course of a home’s lifetime, it will gradually shift as its foundation settles. Over the course of many years, all this shifting can cause gaps to open up around door and window frames. Come melt season, these gaps can allow water into the living space of your home. Use a waterproof caulk to seal these gaps and keep moisture outside.

Install a Sump Pump

This is an especially good idea if your basement has a history of water intrusion. Your sump should be installed at the lowest point in your home, preferably in the middle of the basement floor rather than near walls. Be sure to outfit your sump pump with a backup battery in case you lose power during a storm.

Reseal Your Roof Deck

This will likely require the largest investment of any our suggestions, but it can also be one of the most effective ways to protect your home. Your roof constitutes your home’s first line of defense against water intrusion. Likewise, it’s essential that we maintain it properly. Roof deck sealers are typically thin, flexible membranes that adhere right onto the surface of your roof deck. There are also a number of spray foam products on the market that can help to seal joints between roof sheathing and framing.

Concerned about water intrusion in your home? Give us a call today for a consultation.

Five Signs it’s Time to Repair or Replace Your Water Heater

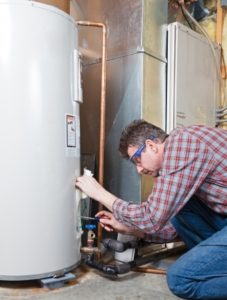
We often do not realize that our water heater needs to be repaired or replaced until we smell rotten eggs or take cold showers. Knowing what to look for can help you avoid the problem in the future. When you know that your water heater is getting of age, or you plan to sell your home, these are important things to check periodically.

  1. Loud Noises
    This could mean that your anode rode broke off and is floating around in your tank. This could also be a result of lime or sediments in the tank. This can be remedied by flushing out the old water, and replacing it with fresh water. If the problem persists, assistance may be required.
  2. A Leaky Temperature/Pressure Valve
    There is a valve on your water heater that acts as a safety switch. It could be as simple as your tank is just overheating, but it could also mean a leaky valve. This should be looked at by someone with experience, but doesn’t necessarily mean repair or replacement is needed.
  3. The Pilot Won’t Stay Lit
    A Pilot that won’t light usually means the thermocouple is bad. It is not an easy DIY project, we suggest involving a professional. Attempting to fix the problem without the proper experience and tools could exacerbate the problem to the point of needing a replacement.
  4. Rust or Corrosion
    Rust and Corrosion are often the cause of the sulfur smell and leaks in water heaters. There is usually no repair for severely eroded or leaky tanks. This is when it should be replaced completely.
  5. Hot Water Isn’t Lasting
    This is something that should always be checked before selling a home. If your water tank is too small for the size of the house, it makes or breaks decisions. If you have a large tank and know this is not the cause, then there may be a lime build up inside.

Trust a Home Inspector with Electrical Inspections

Every home has electricity. So, if you’re moving into a home, you need to make sure that the electrical work is up to code. You could take a whack at it on your own, but I wouldn’t recommend it. Here are 3 reasons to trust a home inspector with the electrical inspection on your home:

Electrical Work is Complicated – If you’re not a an electrician, look at a bunch of wires could look like Latin. If you speak Latin then it looks like some language that you don’t know. You may be able to notice when certain lights or outlets don’t work, but figuring out why or noticing less obvious bu harmful problems won’t be so easy.

Electrical Work can be Dangerous – When inspecting a home’s electrical state, you have to know what you can and cannot touch, as well as other safety precautions and potential hazards. The layman could go into any hazardous situation thinking it’s a walk in the park, so trust someone who knows electrical danger when they see it!

Inspectors Are Not Electricians – This might sound negative, but it’s actually positive. Inspectors will know how to recognize electrical hazards, but they won’t point out things for the sake of finding problems. Look at it this way: have you ever taken your car in for mechanical work? Did the mechanics suggest a bunch of stuff that cost more money and that didn’t seem necessary? An inspector, on the other hand, will only suggest that you fix things that actually need to be fixed.

5 Common Problems in Foreclosed Homes

Buying a foreclosed home can be a very good investment if you have the time and energy to make up for all of the problems that arise from foreclosure. So, before you buy a foreclosed home, get a foreclosure inspection. Here are some common things we see as Chicago home inspectors:

1 – Mold – When people aren’t around to clean, mold grows with ease. Moisture accumulates and the home becomes the perfect environment for various species of mold. This could mean a lot more than cleaning, you may have to replace drywall, beams, etc.

2 – Broken Windows & Siding – The elements and vandals alike love foreclosed homes. Don’t be surprised by broken windows or siding. And remember, siding isn’t there for the sole purpose of making things look nice, it’s there to protect your home, so it’ll need to be fixed.

3 – Infestation – Again, when people aren’t around, rodents, felines, canines, insects and birds make homes. You can’t blame them, but you can’t live with them either. Just because you don’t see them in the living room or basement doesn’t mean they aren’t there. A month after moving in, you might find them in your walls, attic or cupboard.

4 – Malfunctioning Faucets & Toilets – When these go out of use for extended periods of time, they break. Pipes need use to be operational. So, be prepared to call a plumber.

5 – Electrical Malfunctions – This can happen for all sorts of reasons. Animals chew away at wires, lightning hit the house, the prior residents stole electrical components before leaving… anything could happen. Sadly, we can’t live without lights, refrigerators and other electrical appliances, so you’ll need to have these issues looked into.

Keep all of this in mind, have a professional home inspector look into any foreclosed homes for you and good luck in searching for your home!

Avoid Hazardous Dryer Duct Materials!

You probably don’t think too much about your dryer duct. You set it up, it discards dryer air out of your house and there’s not much more to think about.

Or is there?

We encounter this sort of thing all the time during foreclosure inspections. Think about it: dryers create intense heat in small, usually confined spaces in your home. The dryer duct connects directly to your wall and if something goes wrong, you could be left in serious trouble.

Here’s a run down of dryer duct materials:

Plastic – This is an absolute don’t. Plastic can catch fire and spread it at a rapid rate (in other words, plastic ducts are flammable), leading to huge home damage. Stay safe and don’t use plastic!

Foil – While foil is not flammable, it can still virtually disintegrate if a fire starts within it. Some inspectors will not pass a home using this, though it is safer than plastic (and easier to use that semi-rigid aluminum).

Semi-Rigid Aluminum – This material is definitely the best and safest. Like any material, it can deteriorate under intense circumstances, but it has far greater integrity than foil or plastic. The UL listed semi-rigid dryer ducts will definitely offer the preventative safety that your home needs.

Avoid danger by choosing the right dryer duct material. As you know, certain materials withstand heat a lot better than others, in this case the aluminum. You also probably know that it only takes a spark to start a decent fire in the midst of certain materials. So, if you have a plastic or foil duct, get rid of it! Stop the fire when it’s still a spark, avoid danger and pass the home inspection with a semi-rigid aluminum dryer duct.